How to make Pysanky (Ukrainian Easter egg) decorating a Lenten tradition in your home
Published on March 12, 2026
Easter baskets and dyed, colorful, brightly patterned eggs go hand-in-hand. What are the origins, symbolism, and meaning behind this beloved tradition? I came upon the pysanky by marrying into a Ukrainian family, and my love for their egg-decorating has grown year over year.
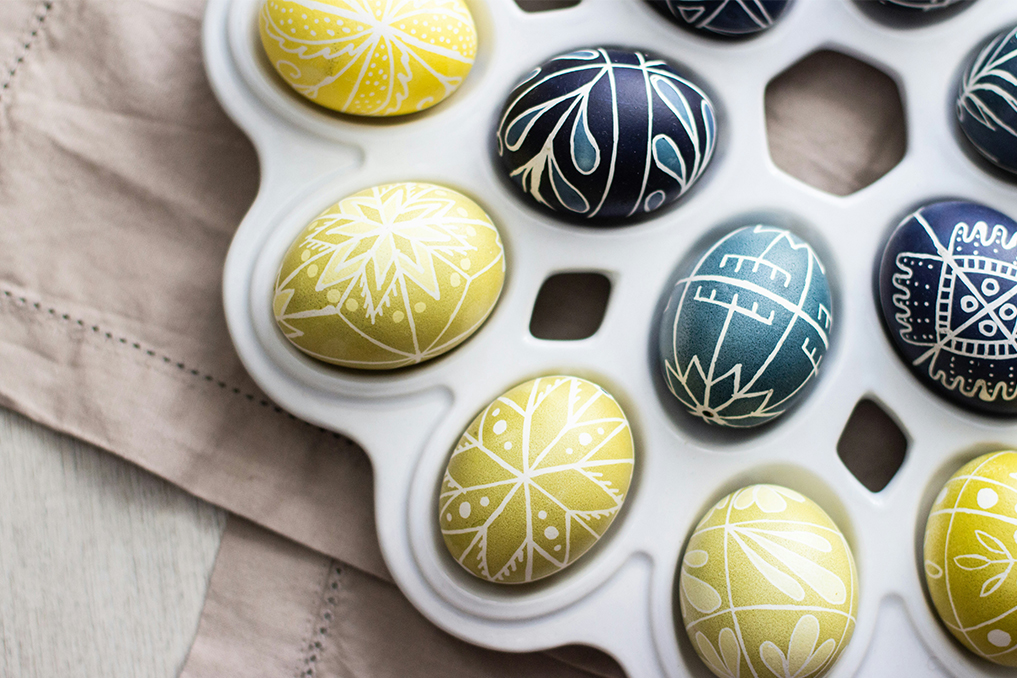
Named after the Ukrainian word pysaty which means “to write,” pysanky eggs are made with melted wax and colorful dyes to create breathtakingly intricate and symbolic designs. While the eggs appear to be painted, they are actually dyed in layers using an ancient wax-resistant method. This Slavic artform, dating back thousands of years, is seen as a form of meditative prayer for those writing the designs and a way to pray specifically for the recipient of the egg.
As Christianity came to Ukraine in the 9th and 10th centuries, the practice of pysanky making became deeply rooted in the Slavic faith tradition — the egg became the symbol for Christ’s victory over death and the designs had Christian symbolism.
Rich in history
Traditionally, the women of the household made pysanky during quiet nights of the Great Fast in preparation for Easter. Each egg would take hours of careful and prayerful work and, when completed, were placed in Easter baskets to be blessed by the priest. From the color to the symbols, every design choice was intentional.
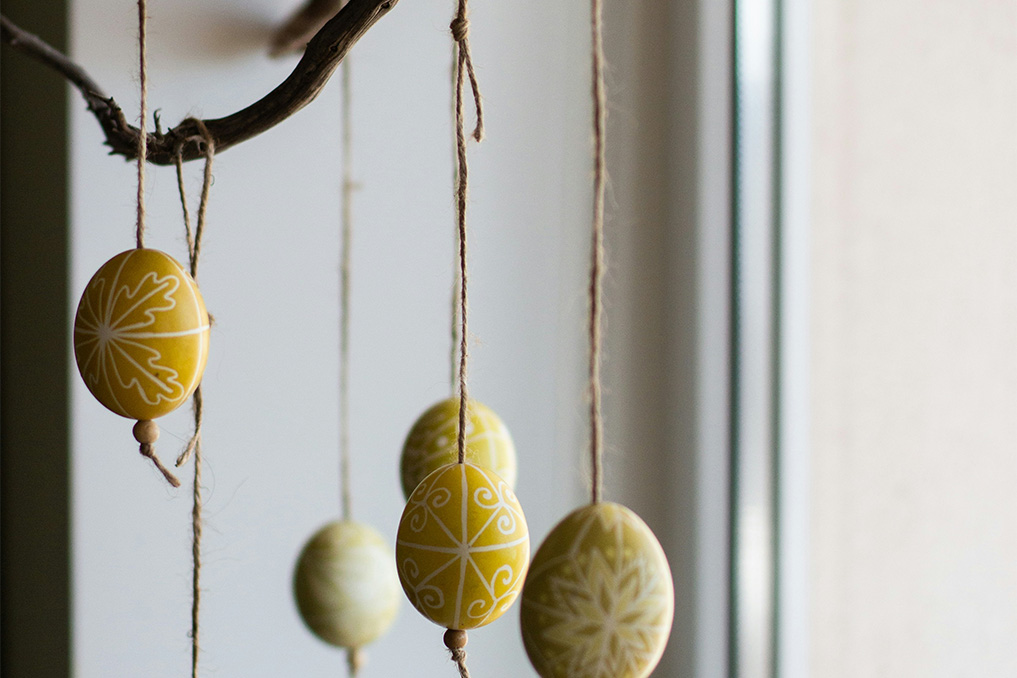
Pysanky were so tightly woven with Christianity and hope that Stalin banned them during the Soviet era. As Ukrainians immigrated worldwide, they brought pysanky with them and continued passing on the artform to younger generations so the practice was not lost. My husband’s grandfather was a skilled pysanky artist, and he shared his love and talent with his children and grandchildren. Several of his works, sitting delicately on metal pedestals, are still proudly displayed in my mother-in-law’s dining room, taken out every year around Easter time. One of my favorites is a depiction of the four seasons.
Even though he is no longer with us, his great-grandchildren are now benefiting from his commitment to uphold cultural traditions and love for the craft. And of course, the Ukrainian diaspora has expanded and rooted itself in many communities around the globe. Not surprisingly, the pysanky tradition has now reached a wider circle of admirers — including many non-ethnic Ukrainians, like myself.
An artform for the entire family
Pysanky eggs are richly symbolic, beautiful, and enjoyable to create. Each step takes determined concentration and even young children can get lost in their creations. They are especially fitting to make during Lent when we are called to quiet our minds and seek a renewed connection with God.
Including children in a craft involving candles, hot wax, and colorful dyes may sound intimidating. Don’t let it scare you! If you are patient and accept a little mess, children as young as five will be enamored with pysanky making.
Every family (regardless of their Slavic roots, or lack thereof) can incorporate this artform into their Lenten preparations. There are certainly many different processes for making pysanky. Here’s one way with a step-by-step guide.

How to make pysanky eggs (for beginners)
Supplies needed:
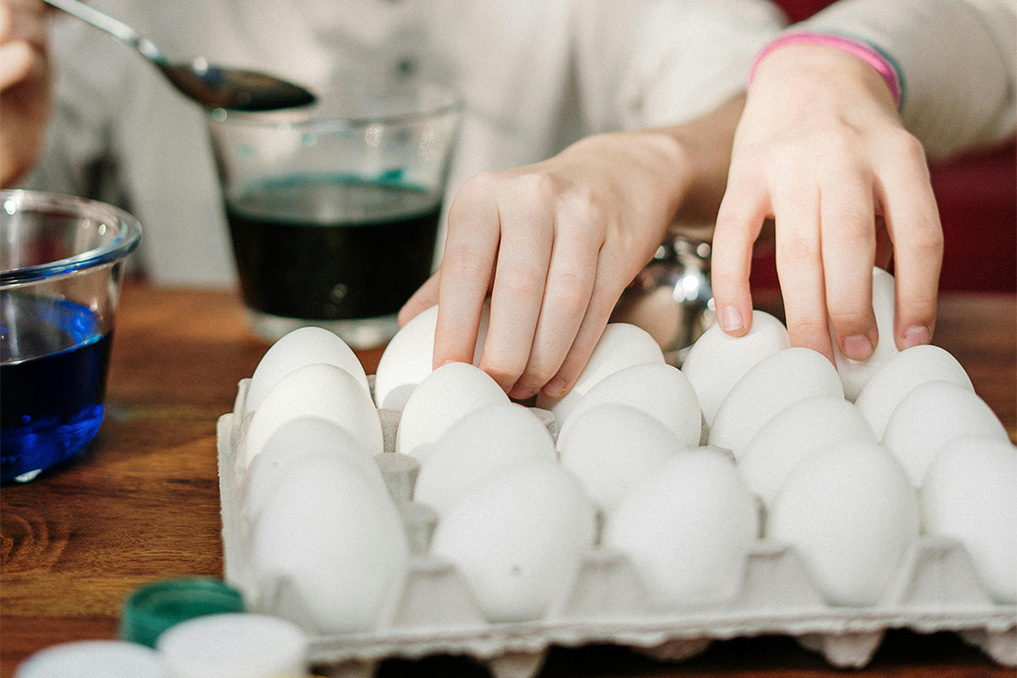
- Eggs — room-temperature, white, unboiled or boiled. Some artists pinprick the eggs and blow out the yolk. One day we will get to that level, but in the meantime we use either unboiled or boiled eggs. For unboiled eggs, if you do not break the egg the yolk will harden and these eggs can last up to a year. For boiled eggs, we use these in our Easter baskets and eat any that do not crack and subsequently get dye on them.
- Kistka — Ukrainian for “little bone” — the fine tool used to dispense wax on the egg
- Candle and candle holder
- Cake of beeswax
- White vinegar
- Batik dyes of varying colors
- Paper towels
Tip: If you live near a slavic cultural center or church, they may sell these kits! Otherwise, finding a beginner pysanky kit online is an easy way to ensure you’re getting the correct supplies.
Step 1: Lightly draw a design on your room-temperature egg with pencil. Using a rubber band can help with creating straight lines and dividing your egg proportionally.
I am always allured by overly intricate eggs but regularly remind myself that as an amateur it is judicious for me to begin with simple designs. Remember to turn to God and ask His guidance on the design. Pysanky-making can be filled with moments of connection with the Lord.
The design options are truly endless. Some designs feature geometric patterns, others have symbols such as wheat, fish, crosses, flowers, animals, or ladders. There are pysanky design books that provide both instructions for specific designs and information about the symbolism, or you can find inspiration on the internet. Whichever combination of designs you choose, your pysanky egg will be beautiful and symbolize the hope and glory of Christ’s Resurrection. Be sure to trust your own creative genius!
Step 2: Warm the kistka over the flame and then scoop out beeswax from the cake into the funnel. Move the wax-filled kistka back and forth over the flame, melting the wax to liquid.
It can be tempting to overfill and overheat the funnel, but this causes an overflow of wax coming onto the egg in globs, which is not ideal for the design. Practice will teach you the “Goldilocks zone” needed for wax to flow at an ideal pace.
Step 3: Take the kistka and, following your pencil lines, apply wax over the parts of your design that you wish to keep white. To keep the wax flowing, you may need to reheat the kistka and eventually refill the funnel with more wax from the beeswax cake.
Step 4: Carefully place your egg in yellow dye. A dye is made with a powder packet, 1 cup of water and 1 tablespoon of white vinegar. The packet should have directions for making the dye. Leave the egg in the dye for 10-15 minutes, or keep it in the dye a little longer if you want a deeper color. Take the egg out of the dye and wipe it with paper towels. Be sure to not wear your favorite clothes, as the dye can permanently stain!
Step 5: Now that your egg is yellow, use the kistka and follow your pencil lines to apply wax over the parts of your design you wish to keep yellow.
Step 6: Repeat steps 4-5 until you have used all of the colors you desire for your pysanky egg. Generally it is recommended to go from light to dark, focusing on warm colors first and then cool colors, ending with black (if you desire a black background). For a beginner, I would recommend choosing 1-2 colors as a start. Some of the most beautiful eggs are simply white and one or two more colors. Simple can be elegant!
A note about dyes: As pysanky artists grow their craft, there are many ways to go about dyeing the egg. From washing after certain colors to applying some dyes with a q-tip that might not mix well with other colors, the art of dyeing pysanky eggs is an entire lesson in itself! As I mentioned earlier, start small and research more as you grow in comfort and skill.
Step 7: After removing your egg from the final dye, dry it with paper towels. Now it is time to reveal your beautiful design! Use the taper candle to melt off the wax by holding your pysanky egg beside the flame. Be sure to keep the egg on the side and not above the flame to avoid getting black soot on the egg.
As the wax melts, remove the egg from the flame and gently wipe the wax away with a paper towel. Since you can only do small spots at a time, this part can take some patience. If there is a lot of wax build-up on one spot, it might take a few times of warming and wiping for it to come off. Eventually, however, all of the wax will come off and you will be left with your beautiful pysanky egg.
Step 8: If you want to empty your egg, there are many tutorials online that detail how to blow out the pysanky egg. There are special tools required for this practice. If you choose to leave it as is, you have completed your first pysanky egg!
Congratulations! Even if your lines aren’t perfectly straight, your Easter basket will be brimming with symbolism and beauty.
Related Posts


What to wear when it’s 40° in the morning and 65° by noon
By Jessica Nardi
The line that runs through every human heart
By Johanna Duncan