7 Things every woman should know about her car
Published on April 21, 2025

I’m a commuter student, so I’m no stranger to driving on the expressway. I recently bought a new car with my own savings and love the freedom my car brings me!
How I got my newest car wasn’t really planned. It started with a strange rattling on the expressway from my 2005 Subaru Impreza. If it had just held out a few more years, it would have achieved collector status.
But the collector plates were not to be.
First came the rattling—then the steam. It wasn’t smoke, just coolant evaporating from a cracked radiator. By the time I reached the off-ramp, the gas pedal stopped responding.
Thankfully, I made it home safely and now take great care of my new vehicle. I’ve become a bit paranoid, but it’s paid off! Now I’m sharing what I’ve learned so you can feel confident both behind the wheel and under the hood.
Tire pressure
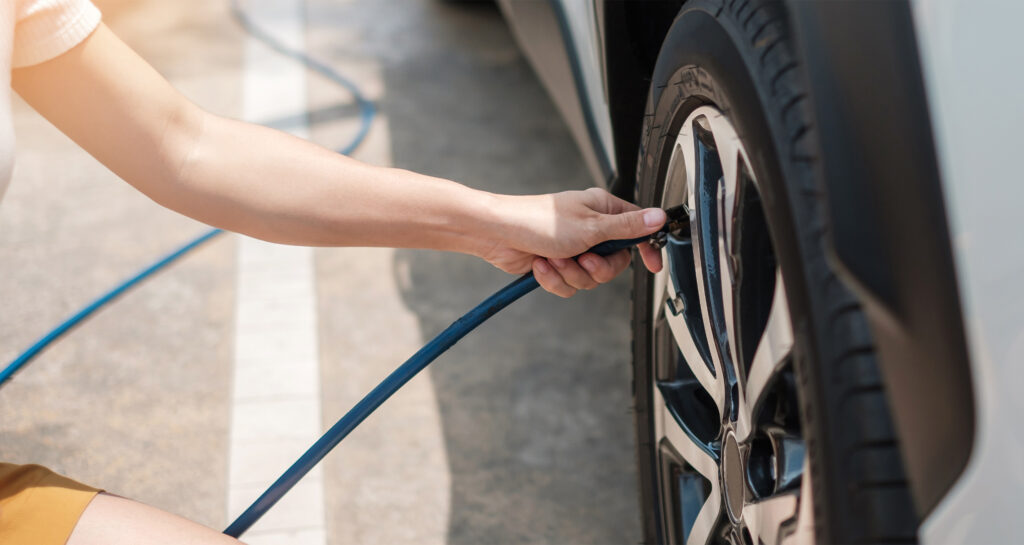
Get yourself a simple tire pressure gauge at any store. Check the sticker on the driver’s side door or in your car manual. This will tell you what the tire pressure should be, it’s usually between 30-35 PSI (pounds per square inch).
- Find the valve stem (it’s the little nozzle that sticks out of the tire). You’ll find it on all four tires.
- Twist off the tiny valve cap (don’t lose it!). Keep it in your hand or place it somewhere safe.
- Take your tire pressure gauge and press it firmly onto the valve stem. You’ll hear a “pssst” sound (totally normal). That’s just air leaving the tire for you to measure.
- Look at the number on your tire pressure gauge. It’ll be in PSI. Compare that number with the pressure listed on your car’s door frame sticker or in the manual.
- Once everything’s perfect, screw that valve cap back on to keep your tire safe and clean!
You can do this once a month. Be especially diligent about checking when it’s cold!
Where to find the spare tire
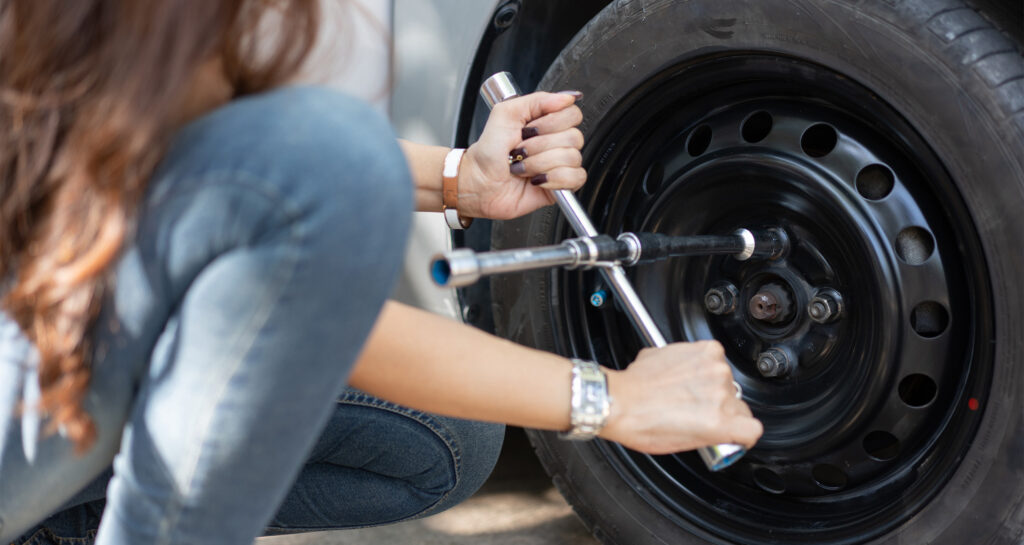
Most cars will store their spare tire in one of these places:
In the trunk: Sedans, hatchbacks, and some SUVs.
Open the trunk and lift up the floor mat or carpeted cover in the back. Look for a circular metal cover or a plastic compartment. Your spare tire is usually tucked underneath!
Under the car: More common in trucks and some SUVS.
Look directly underneath the back of your car. Look for a winch or bolt holding the tire in place.
For SUVs or crossovers, open the back hatch, and check under the floor panel in the trunk area. It could also be tucked in a side compartment, so give a little tug on panels that might open.
Now that you’ve located your spare, you’re ready for anything that comes your way!
Checking your coolant reservoir
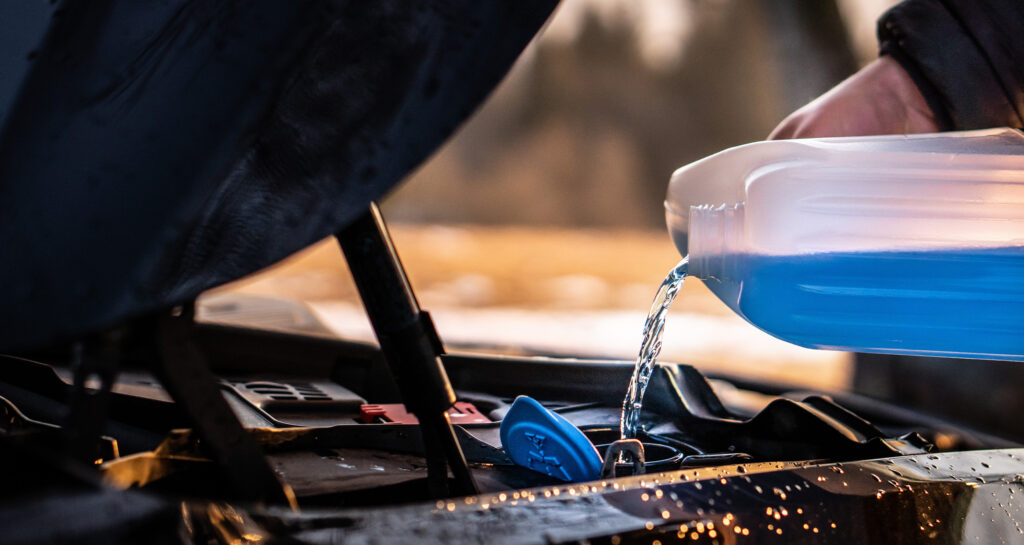
Coolant (also known as antifreeze) keeps your engine from overheating, so it’s super important to check it regularly to avoid engine trouble. Don’t worry – this is a quick and easy check that anyone can do!
Wait at least 30 minutes before checking your coolant because opening the cap could lead to burns or injury if the engine is hot. Usually, coolant checks happen as often as your oil change or every couple of months.
- Pop the hood. Find the hood release lever inside your car (usually located on the driver’s side under the dashboard), and pop the hood open. Pro Tip: Once the hood is open, use the hood prop to secure it in place (if your car has one).
- The coolant reservoir (also called the coolant overflow tank) is usually a plastic tank near the back of the engine bay, often on the passenger side. It will usually have colored liquid (bright green, pink, orange, or blue) inside and often says “coolant” or “antifreeze” on the cap. The reservoir may be clear or frosted. Tip: Still not sure? Consult your car’s manual for the exact location.
- Look at the side of the tank to see where the coolant level is. If the liquid is at or above the “FULL” mark, you’re good to go! If the level is near or below the “LOW” mark, you’ll need to add more coolant.
Healthy coolant is usually bright and colorful (green, orange, pink, etc.). If it looks dark, rusty, or contaminated, it may need to be changed. Remember, never mix different types of coolant (check your manual to see what your car uses)!
If the coolant looks sludgy or has debris floating in it, it’s time for a coolant flush (usually done by a mechanic).
Now, you can feel confident knowing how to keep things cool under the hood!
Checking your oil levels
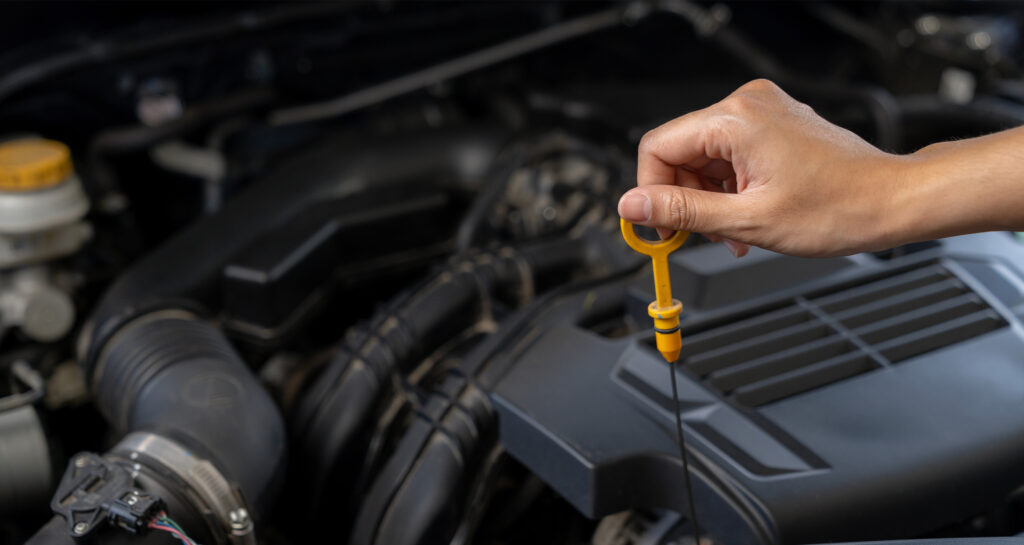
Oil is like the lifeblood of your car’s engine, and keeping it at the right level ensures your car runs smoothly. With a quick check using the dipstick, you’ll be on top of your car’s health in no time!
Before you check your oil, make sure your car is on a flat surface so the oil settles evenly in the engine. This ensures an accurate reading.
Healthy oil should be a brown, amber color and a smooth, not sludgy consistency. If it’s black and gritty, it’s time for an oil change. Once a month or every 3,000 miles-7,000 miles is ideal for most cars.
- Find the hood release lever inside the car (usually located near the driver’s seat, under the dashboard).
- Pop the hood, then find the hood prop (a rod that holds the hood up) and secure it in place. Now you have access to the engine!
- The dipstick is a long metal rod with a yellow or orange handle (sometimes it’s just a simple ring or loop). It usually says “Engine Oil” near it.
Tip: It’s usually located near the front of the engine, and the handle might be brightly colored to make it easy to find. - Make sure the dipstick is clean, wipe it with a rag before plunging it back (gently, of course) into the oil reservoir.
- Now, check the oil level. Look for the markings on the dipstick—usually there’s a line or two indicating the minimum and maximum oil levels.
If the oil level is between the two marks, you’re good to go!
If it’s below the minimum mark, it’s time to add oil. - Once you’re done, slide the dipstick back into its tube and make sure it’s securely in place.
Your car will thank you for taking care of it. Way to keep that engine running smoothly!
Replacing wiper blades
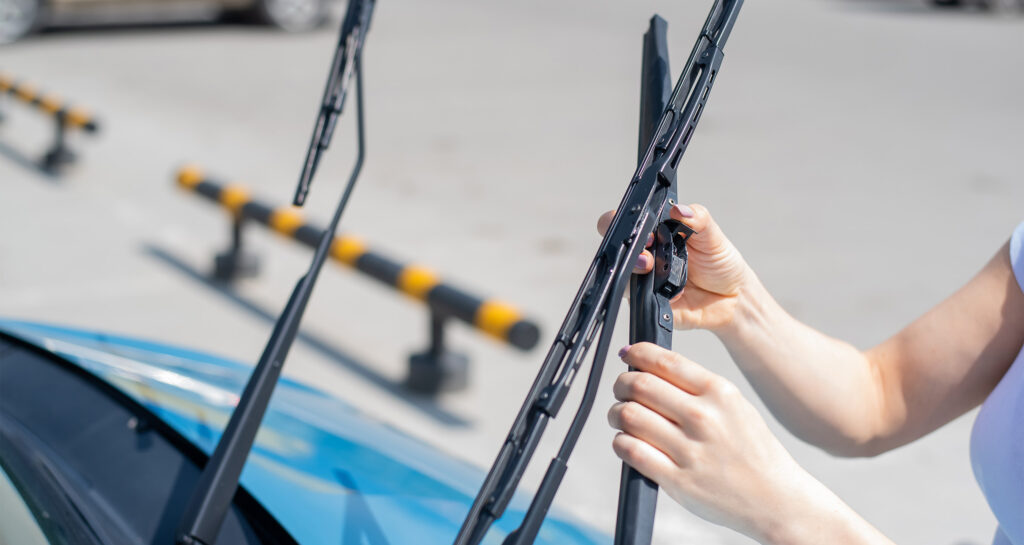
If your wiper blades are streaking, squeaking, or leaving dirt behind, it’s time to swap them out!
Most cars use different sizes for the driver’s side and passenger’s side wipers. Make sure to check the sizes before buying new ones. You can easily find this info online or ask the store associate to help you.
Wiper blades should be replaced every 6-12 months. They come in two main types: conventional and beam. Conventional blades have a frame, while beam blades are one solid piece. You’ll need to know what type your car uses.
- Gently lift the wiper arm away from the windshield. It should stay upright, but be careful, as the arm is spring-loaded and can snap back! Hold the arm at the base as you work.
- Most wiper blades have a release tab at the point where the blade connects to the wiper arm. Press the tab to release the blade from the hook that holds it in place.
- Slide the blade down and away from the hook, and pull it off the arm.
- Slide the new blade onto the wiper arm: Align the new wiper blade with the arm and slide it into place. Make sure it locks securely into the hook. You should hear a click when the blade is properly attached. Give it a gentle tug to make sure it’s secure!
- Do the same for the other arm. To make sure you attached them correctly, try the new wipers out.
Now you’re ready to replace your wiper blades whenever you need to—no more streaks, no more squeaks!
Where to find your VIN number

The VIN (Vehicle Identification Number) is like your car’s fingerprint—every car has a unique one! You’ll need it for things like registration, insurance, or when you’re buying or selling your car. This is usually where you’ll also find information like the car’s make, model, and manufacturing date.
The most common location for the VIN is on the dashboard on the driver’s side. It’s visible from the outside through the windshield.
If you can’t see the VIN through the windshield, it’s often located on the door frame (right next to where the door latches when it’s closed).
If you still can’t find it, pop the hood and look around the front of the engine bay; the VIN might be etched into the metal or appear on a sticker.
Whether you’re buying, selling, or just filling out paperwork, you can confidently say you got this!
Related Posts


Nunc coepi: Resetting your family’s Lent
By Jessica Nardi